
This folder
Everything needed to view this guide is bundled here. You can open index.html directly in a browser, host the folder on any static server, or zip and share it with editors.
Contents
site-guide/
├── index.html          ← open this file (site-guide.nglhrc.com)
├── styles/guide.css    ← brand colours & layout
├── fonts/              ← Plain + Fraunces (bundled)
├── images/
│   ├── logo-colour.png
│   ├── logo-white.png
│   ├── favicon.svg
│   └── screenshots/
│       ├── studio-structure-hero-deck.png
│       ├── studio-faqs-list.png
│       ├── studio-team-editor.png
│       └── studio-news-empty.png
└── README.txt
Brand colours
The guide uses the same palette as the NGLHRC website.
Quick start
Three steps for any content change. Bookmark the Studio link and you are ready.
- Log in to Sanity Studio Open content.nglhrc.com and sign in with your Sanity account.
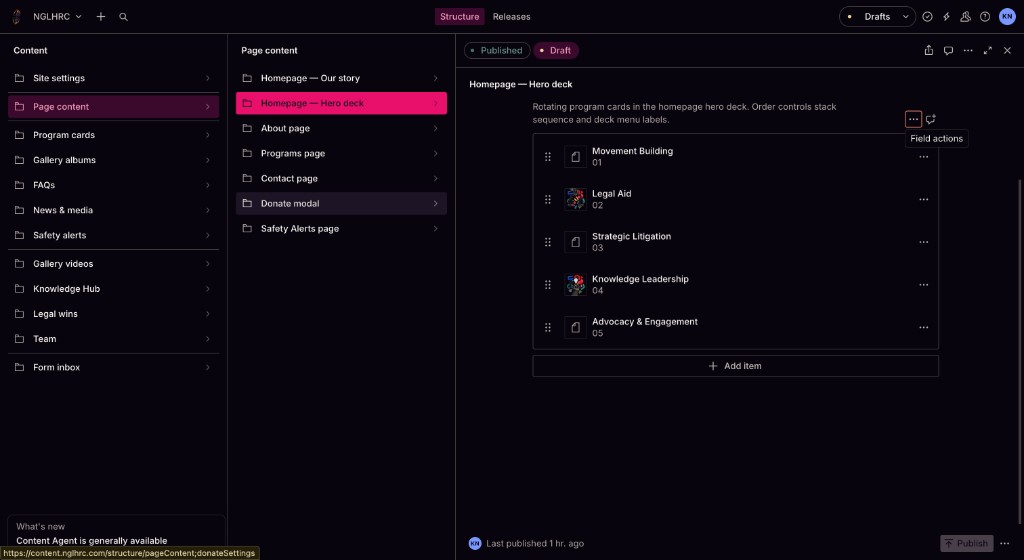
- Find the content in the left sidebar Use the three-column Studio layout — content types on the left, page or collection list in the middle, editor on the right.
- Edit, then click Publish Saving a draft does not update the live website. Always press Publish when you are done.
Good to know
If Sanity content is missing or deleted, the website falls back to built-in default copy so pages never go blank. Publishing your CMS content replaces those defaults.
Open the Studio
The content editor is a separate app from the public website.
Studio URL
Sign in with your Sanity account. The Studio uses a three-column layout: Content types on the left, Page content (or collection items) in the middle, and the editor on the right.
Developers can also run it locally at http://localhost:3333 with npm run studio:dev from the project folder.
Publish changes
Drafts are invisible to visitors. Publishing pushes content to the live site within a few seconds.
Add new content
- Open the collection (e.g. Team) in Content
- Click the + button above the list
- Fill in fields → Publish
Edit existing content
- Click the document in the list
- Change any field → Publish
Remove content
- Open the document
- Menu (⋯) → Delete
- Or unpublish to hide it
Add, edit & remove
The same pattern applies to every collection (Team, FAQs, Program cards, Gallery, etc.).
Collections vs page settings
Collections (Team, FAQs, News…) — many documents. Use Create new to add, open a row to edit, delete to remove.
Page settings (About page, Programs page…) — one document each, already created. Open it directly from the sidebar — there is only one to edit.
Team members
Staff appear on the homepage. Advisory board members appear on /advisory-board.
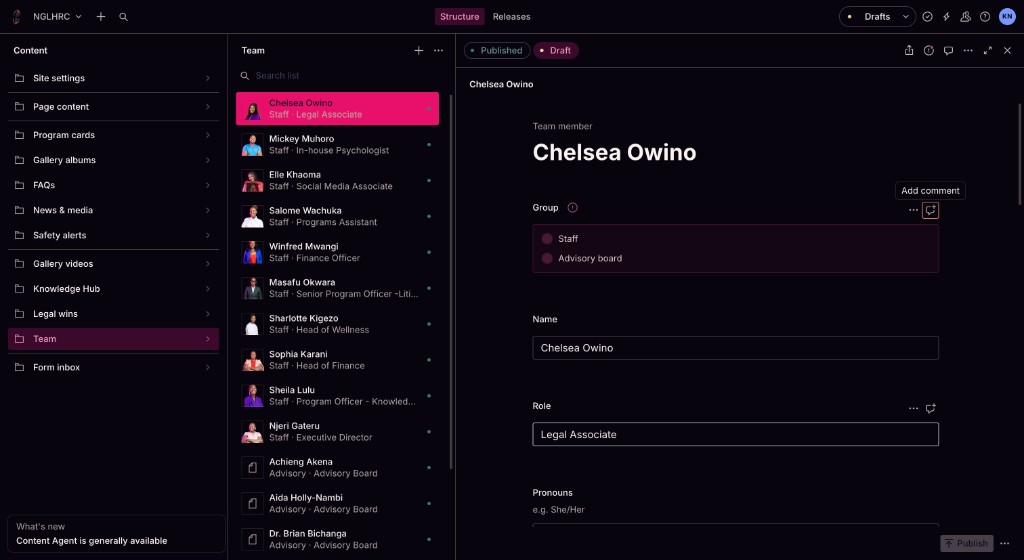
- Add a staff member Studio → Team → click the + button above the member list. Set Group to Staff. Fill name, role, pronouns, bio, and upload a photo. Set Sort order to control position in the grid. Publish.
- Edit a member Team → click their name → change fields → Publish.
- Remove a member Open their document → ⋯ menu → Delete. The site reverts to the built-in fallback list if no other CMS team exists.
Programs & detail pages
Each program has a flip card on /programs, an optional dedicated landing page, and optional presence in the homepage hero deck and scrolling marquee.
Programs page settings
Pages → Programs page — hero image, intro paragraph, and the sliding photo marquee at the bottom of /programs.
Program flip cards (Card tab)
Program cards collection — open any card and use the Card tab.
-
Create a card
Program cards → Create. Set a stable Key (e.g.
legal-aid), title, blurb, back summary, and upload a front illustration (required for the card to appear). -
Link to the detail page
Cards show Learn more → by default. The back link URL defaults to
/programs/{key}unless you set Back link URL or a detail override. -
Mark one as featured
Toggle Featured card for the large hero-style layout on
/programs. - Reorder cards Use Sort order — lower numbers appear first.
Program landing pages (Detail page tab)
Every program can have a full landing page at /programs/your-key — similar to Strategic Litigation, but editable per program.
- Open the program in Program cards → switch to the Detail page tab.
- Fill Intro paragraph, Main content (rich text), and optional Expandable sections.
- Upload a Detail page hero image or leave blank to fall back to the card illustration.
- Set Primary CTA label and link (e.g. Contact, Knowledge Hub).
- Use Detail page URL override only when the card should link elsewhere — e.g.
/our-winsfor Strategic Litigation. - Publish. Visit
/programs/legal-aid(replace with your key) to preview.
Homepage hero deck
Homepage → Hero deck cards — rotating dimension cards on the homepage hero. Each card has a Link URL; set this to the program detail page (e.g. /programs/legal-aid). Visitors see Explore → on the card front.
Homepage programs marquee
On each Program card, open the Homepage marquee tab. Toggle Show on homepage marquee, then set marquee label, body, and link. These feed the scrolling program row at /#programs on the homepage.
Co-write submissions
Visitors can draw and write on the Building Safer Futures co-write canvas, then click Share your page. Submissions arrive in Studio for review — nothing goes public until you mark it Featured.
Review-first workflow
All visitor submissions start as Pending review. Only items you set to Featured (public) appear in the community gallery on the Building Safer Futures experience (homepage modal).
- Find new submissions Studio → Co-write submissions → Pending review. Each document includes the contribution image, optional display name, caption, extracted text, and consent flag.
- Review content Read the image and Text on page field. Add internal Moderation notes if needed.
-
Approve or feature
Set Status to:
- Approved (archive only) — kept for records, not shown on the site
- Featured (public) — appears in the community gallery
- Rejected — not shown publicly
- Order featured items For featured submissions, set Featured sort order — lower numbers appear first. Manage the list under Co-write submissions → Featured (public).
- Configure the gallery Pages → Liberated mural & gallery — toggle Show community gallery, edit title and intro, set max items.
Mural regions (official content)
On the same Liberated mural & gallery document, edit the six mural region tiles (Movement, Law, Presence, etc.) — caption, Today, and Vision copy for the interactive portrait. This is separate from visitor submissions.
Co-write studio is desktop-first
The draw-and-write canvas works best on laptop or desktop. Mobile visitors see a hint to open the page on a larger screen. Sharing requires the co-write studio to be open.
Page content
Singleton pages — open directly from Page content in the sidebar.
| Document | What you can edit |
|---|---|
| Homepage — Our story | Portrait carousel images, caption, rotation speed, headline, body paragraphs, CTA label |
| Homepage — Hero deck | Dimension card titles, tags, blurbs, back summaries, colours, link URLs (program detail pages) |
| About page | Hero image, decade photo, mission photo, impact stats, community needs bullets |
| Contact page | Hero photo, office phone cards, visit panel sidebar image |
| Donate modal | Left panel image, eyebrow text, tagline |
| Safety Alerts page | Rights guide, safety tips, safe areas, emergency contacts (full page body) |
| Liberated mural & gallery | Mural caption, six region tiles (Movement, Law…), community gallery toggle, gallery title, intro, max items |
| Site settings | Top bar urgent alert, social links, form notification email routes, default contact email |
About page narrative
Long-form story paragraphs and the timeline on /about are still in code. CMS covers photos, stats, and community needs — contact a developer for narrative copy changes.
News, gallery & more
Step-by-step for each major collection.
FAQs
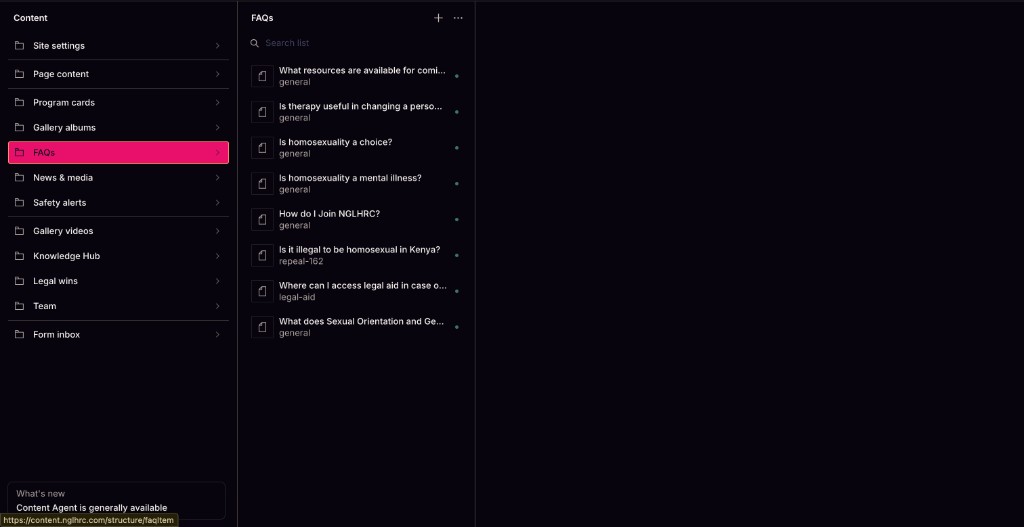
FAQs in Content → click + to add. Set question, answer, category (General / Repeal 162 / Legal aid), and sort order. Appears on /faq and the first four on the homepage.
News articles
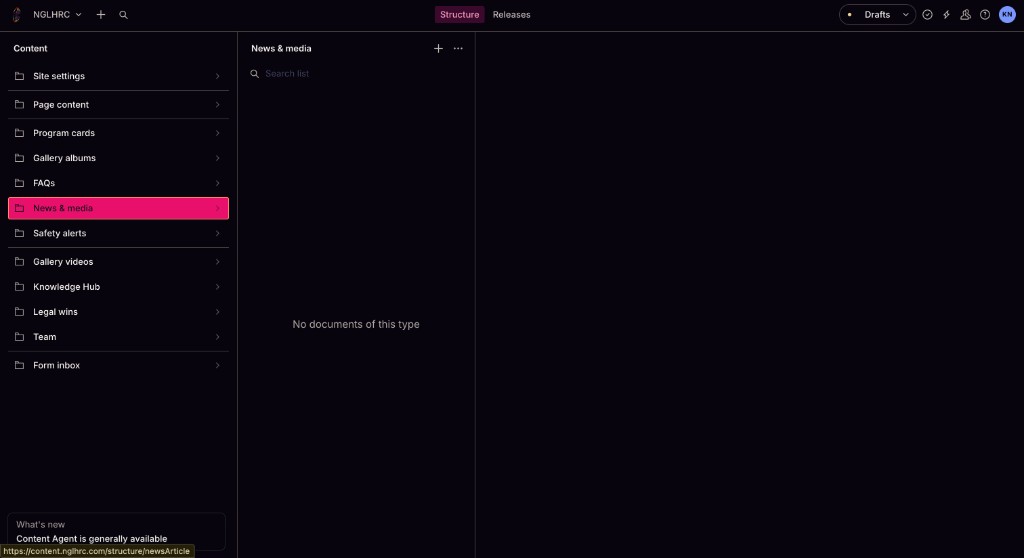
News & media in Content → click + to create. Required: title, slug, published date, category, cover image. Live at /news/your-slug.
Note: The main /news listing still shows the year archive of external links. Individual CMS articles work at their slug URL. Full article body rendering is coming soon.
Safety alerts (News promos)
Safety alerts → Create. Title, summary, published date. Keep Active on. Latest three appear on the News page.
Gallery albums
Gallery albums → Create. Title, slug, cover image, photos array. Toggle Featured in gallery hero for homepage-style hero rotation on /gallery.
Gallery videos
Gallery videos → Create. Paste a YouTube URL, add title and description. Publish.
Knowledge Hub (publications)
Knowledge Hub → Create. Title, slug, category, excerpt, cover image. Upload a PDF or paste an external download link.
Images & files
How to add and replace images across the site.
- Upload in Studio (recommended) Click any image field → drag a file or browse. Sanity hosts the file on its CDN automatically. Always prefer Sanity image uploads over legacy paths for photos you replace often (About, team, program heroes).
-
Legacy path (temporary)
Some fields still accept a Legacy path like
/assets/images/team/photo.pngfor images already on the server. Replace with an upload when you can — legacy files may be cached longer by browsers. - Photo cropping (team) Team members have Photo vertical focus / height / offset fields to fine-tune how portraits crop in the grid.
-
Object position
Many image fields include an object position value (e.g.
center 38%) to control which part of the image is visible in cards.
Image tips
Use WebP or JPEG for photos. Aim for under 500 KB where possible. Illustrations for program cards work best as WebP with transparent or simple backgrounds.
If a CMS image change does not appear right away, hard-refresh (Cmd+Shift+R / Ctrl+Shift+R) or wait a few seconds after Publish. Re-uploading to the Sanity Image field (not only a legacy path) gives the fastest updates.
Not in the CMS
These areas still require a developer. Ask the tech team rather than searching Studio.
| Content | Why |
|---|---|
Code Our Wins page (/our-wins) |
Full timeline is hardcoded; Legal wins schema exists but is not wired yet |
| Code About page long narrative & timeline | Only photos/stats/needs are CMS-editable |
| Code Main navigation labels | Nav structure is in code; social links are in Site settings |
Code News year archive on /news |
External press links by year |
| Code Donation checkout (Paystack) | Keys and enablement via environment variables — see Paystack review |
| Code Program default illustrations & colours | Used when a CMS card has no illustration uploaded |
| Code Co-write “Share your page” API | Requires server deploy and VITE_API_BASE_URL — contact support if sharing fails on the live site |
Production & staging
The public site and developer workflow use two deployment tracks. Content editors work in one Sanity Studio — changes appear on both environments once published. This handbook lives at site-guide.nglhrc.com.
| Environment | Website | Git branch | Purpose |
|---|---|---|---|
| Production | nglhrc.com | main |
Live public website. Only merge tested work here. |
| Staging | Staging preview URL (from hosting provider) | staging |
Review developer changes before production. Auto-deploys from the staging branch. |
| Content Studio | content.nglhrc.com | — | CMS for editors. Same dataset for both environments. |
| Site guide | site-guide.nglhrc.com | — | Editor handbook for the upgraded website (this document). Also at /site-guide/ on nglhrc.com. |
Workflow for developers
Open pull requests against staging first. After review on the staging site, merge staging → main to release to nglhrc.com. Need the staging URL or deploy access? Email support@seersmith.com.
For content editors
Publishing in Sanity updates content on both production and staging (they share the same CMS dataset). Code changes (layout, new features) only appear on staging until merged to main. Bookmark site-guide.nglhrc.com for editing help.
Paystack review
For developers or Paystack administrators auditing donations and book orders. No secret keys belong in this guide or in the website codebase.
Security rule
Only the public key (pk_test_* or pk_live_*) is loaded in the browser. The secret key (sk_*) lives on the server only (nglhrc-web-server) and must never be committed to git or pasted into chat.
What Paystack powers
- Donate modal — preset amounts in KES, custom amount, card / mobile money via Paystack Inline
- Hatimaye book orders — fixed price checkout (KES 3,500)
When Paystack is off, both flows fall back to manual options (contact page, M-Changa paybill).
Environment variables (names only)
Set these in your hosting dashboard or local .env — never commit real values.
| Variable | Where | Safe in browser? | Description |
|---|---|---|---|
VITE_PAYSTACK_PUBLIC_KEY |
nghlrc-web | Yes (public) | Paystack public key. Use pk_test_* on staging/local; pk_live_* on production only. |
VITE_PAYSTACK_ENABLED |
nghlrc-web | Yes | Optional kill switch: set false to disable checkout and show manual donate / M-Changa flows. On by default. |
PAYSTACK_SECRET_KEY |
nglhrc-web-server | Never | Server-only secret for webhook signature verification. Not used by the donate UI. |
Checkout enablement
Paystack checkout is on by default when VITE_PAYSTACK_PUBLIC_KEY is set. Set VITE_PAYSTACK_ENABLED=false on an environment to disable it. Logic: src/config/paystackFeature.ts.
Donation limits & presets (code defaults)
- Currency: KES
- Preset amounts: KES 500, 1,000, 2,500, 5,000, 10,000, 25,000
- Minimum: KES 100 · Maximum: KES 5,000,000
- Source:
src/config/paystack.ts
How to verify without exposing keys
-
Check the key prefix in hosting env
Staging should use
pk_test_…. Production should usepk_live_…. Never putsk_keys in the frontend env. - Confirm checkout UI on staging On the staging site, open Donate or Hatimaye — you should see “Secured by Paystack” and the inline popup. If you see manual M-Changa / contact copy instead, Paystack is disabled via env or the public key is missing.
- Run a test transaction Use Paystack test mode on staging with test cards from the Paystack test payments docs. Confirm the charge appears in the Paystack dashboard under Test Transactions.
- Audit the Paystack dashboard Log in at dashboard.paystack.com. Review API keys (Settings → API Keys & Webhooks), allowed domains, and transaction logs. Rotate keys there if compromised — then update hosting env vars only.
-
Webhook endpoint (server)
Production server exposes
POST /api/webhooks/paystack. Set the URL in Paystack → Settings → API Keys & Webhooks and configurePAYSTACK_SECRET_KEYon the server. The handler verifies signatures, re-checks each transaction with Paystack, and records donations / book orders in Sanity.
Review checklist for Paystack admins
- ☐ Production uses
pk_live_*; staging/local usepk_test_* - ☐ No
sk_*orpk_*values in git history or this documentation - ☐
https://nglhrc.com(and staging URL) allowed in Paystack dashboard if required - ☐ Test donation completes on staging; live donation tested once before announcing
- ☐ Webhook URL pointed at production API when ready; signature verification enabled
- ☐
VITE_PAYSTACK_ENABLEDis not set tofalseon production
Questions?
Support contact: support@seersmith.com. Reference files: nghlrc-web/.env.example, nglhrc-web-server/.env.example, src/lib/paystack/.
Troubleshooting
Common issues and fixes.
Changes not showing on the website
- Did you click Publish? Drafts are not live.
- Hard-refresh the browser: Cmd+Shift+R (Mac) or Ctrl+Shift+R (Windows).
- CDN may take a few seconds — wait and refresh again.
Website shows “403 Forbidden” or blank CMS content
The website domain may not be in Sanity’s CORS allowlist. A developer must add your URL in Sanity API settings (e.g. https://nglhrc.com and your staging URL).
New Studio sections missing
Schema updates require redeploying Studio: npm run studio:deploy. Then hard-refresh Studio.
Program card not appearing
Every program card must have a front illustration uploaded. Check that the document is published and sort order is set.
Program detail page is empty or 404
- Confirm the program card is Published and has a valid Key (e.g.
legal-aid→/programs/legal-aid). - Add content on the Detail page tab — intro and main content at minimum.
- If using Detail page URL override, the card may link elsewhere instead of
/programs/{key}.
Co-write “Share your page” fails
- Visitors must add content to the canvas first (draw, text, or stickers).
- Sharing requires a desktop/laptop browser — the full studio is not available on phones.
- On the live site, sharing needs the API server deployed. If you see an error, email support@seersmith.com.
Featured co-write work not in gallery
- Submission status must be Featured (public), not merely Approved.
- Pages → Liberated mural & gallery → ensure Show community gallery is on.
- Check Featured sort order and publish both the submission and gallery settings.
Deleted content reappeared
The site falls back to built-in defaults when CMS content is empty. This is intentional — publish new CMS content to replace defaults.
For developers
Technical reference for seeding, deploying, and local development.
Studio commands
npm run studio:dev      # local → http://localhost:3333
npm run studio:build    # production build
npm run studio:deploy   # deploy to content.nglhrc.com
Seed all content from fallbacks
Requires SANITY_API_TOKEN (Editor) in .env:
npm run seed:all
Individual seeds: seed:pages, seed:team, seed:faqs, seed:publications, seed:gallery-videos, upload:team-photos
Project details
- Production site: nglhrc.com (
mainbranch) - Staging site:
stagingbranch — ask support@seersmith.com for URL - Sanity project:
y3i6nrx5 - Dataset:
production - Frontend queries:
src/lib/sanity/ - Fallback data:
src/content/*Fallback.ts - Full technical README:
sanity/README.md
Contact
Who to reach for help beyond everyday content editing.
| Need | Contact |
|---|---|
| Content editing (Sanity) | Use this guide + content.nglhrc.com |
| Website bugs, staging access, deployments, Paystack | support@seersmith.com |
| General NGLHRC enquiries | nglhrc.com/contact |